MVP Lift Up Gel by SOMFIS is a professional UV/LED nail gel system that follows a 3-step application process.
Note: a UV/LED lamp is required
Step 1
LIFT UP BASE
Its special formula with adhesive properties helps support the nail surface and prepares it for Step 2 and the application of the Care Gel.
CURE IN UV/LED FOR 30-60 SEC
Step 2
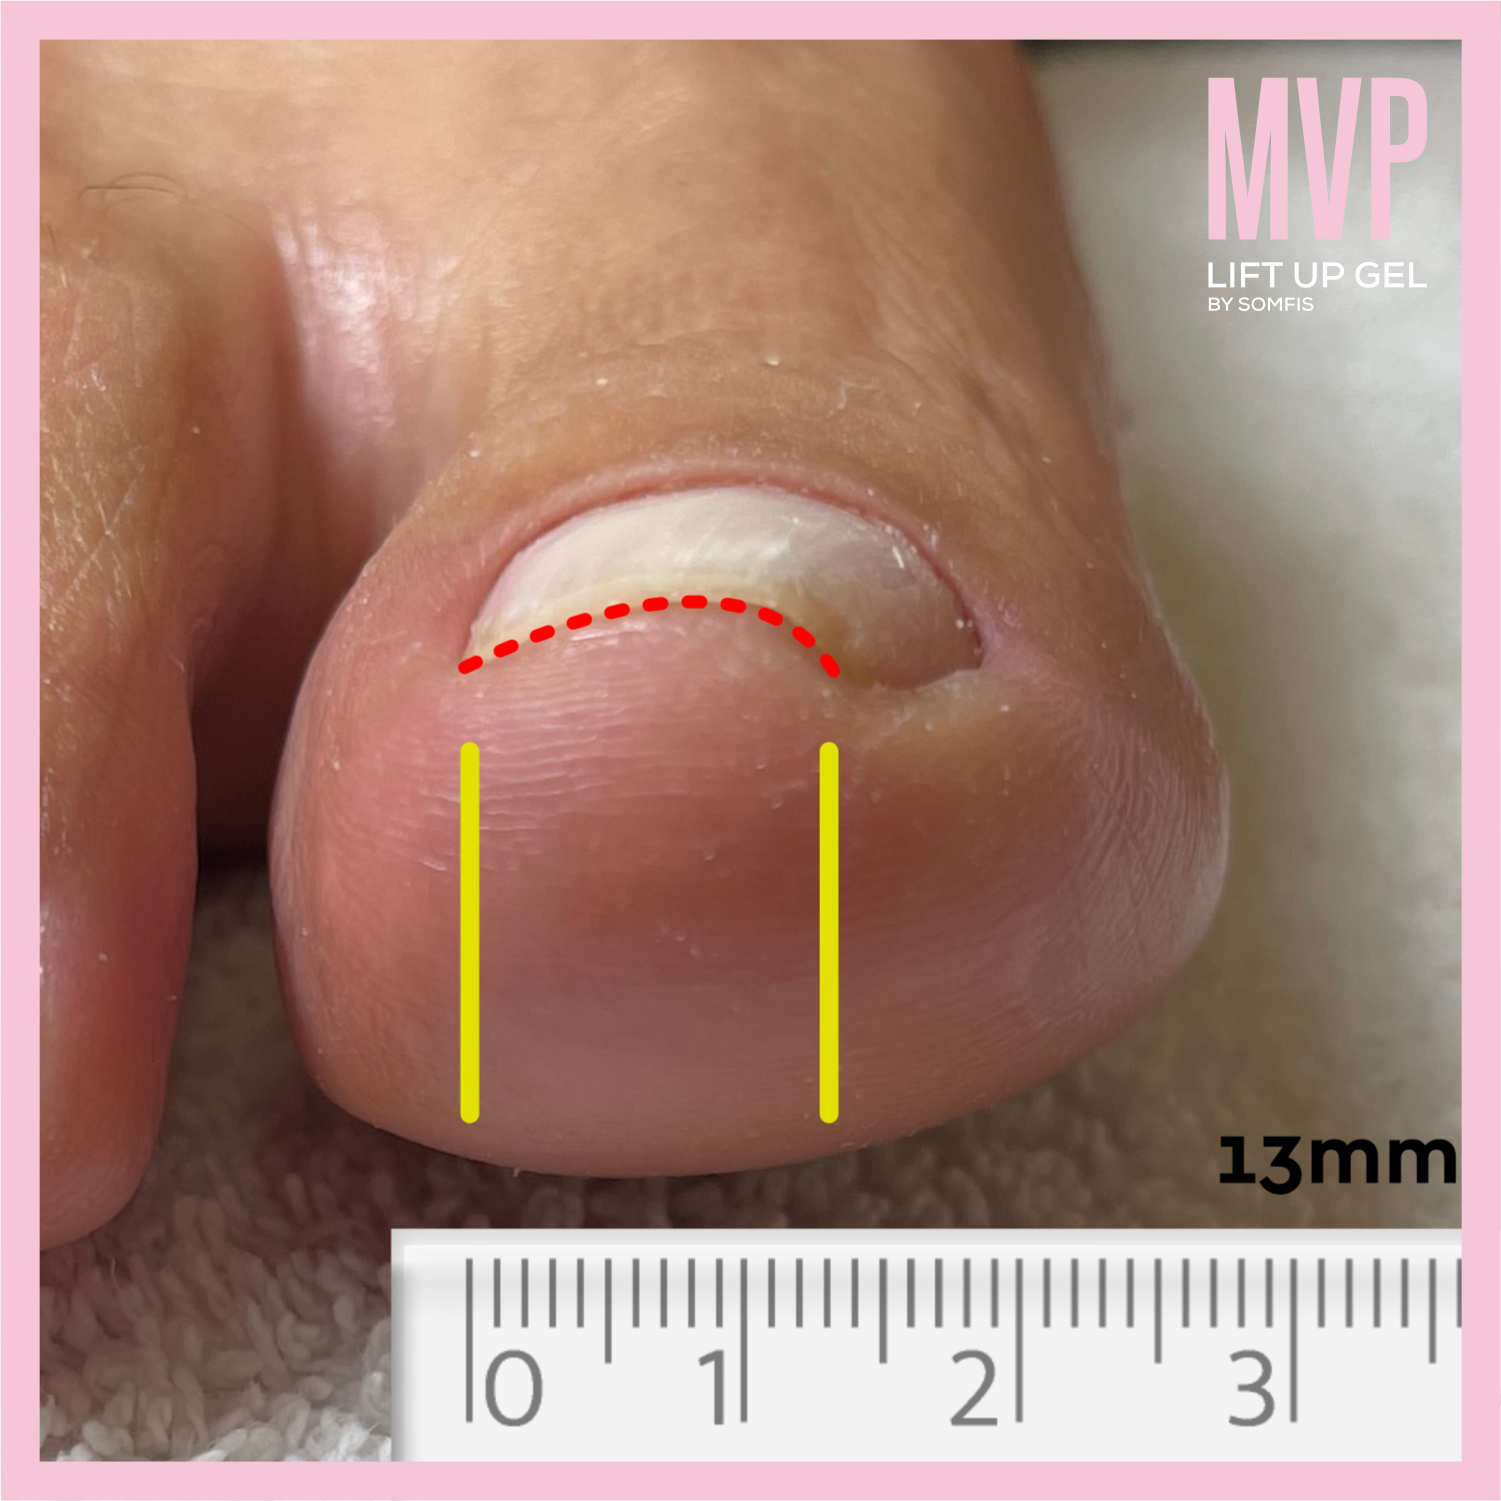
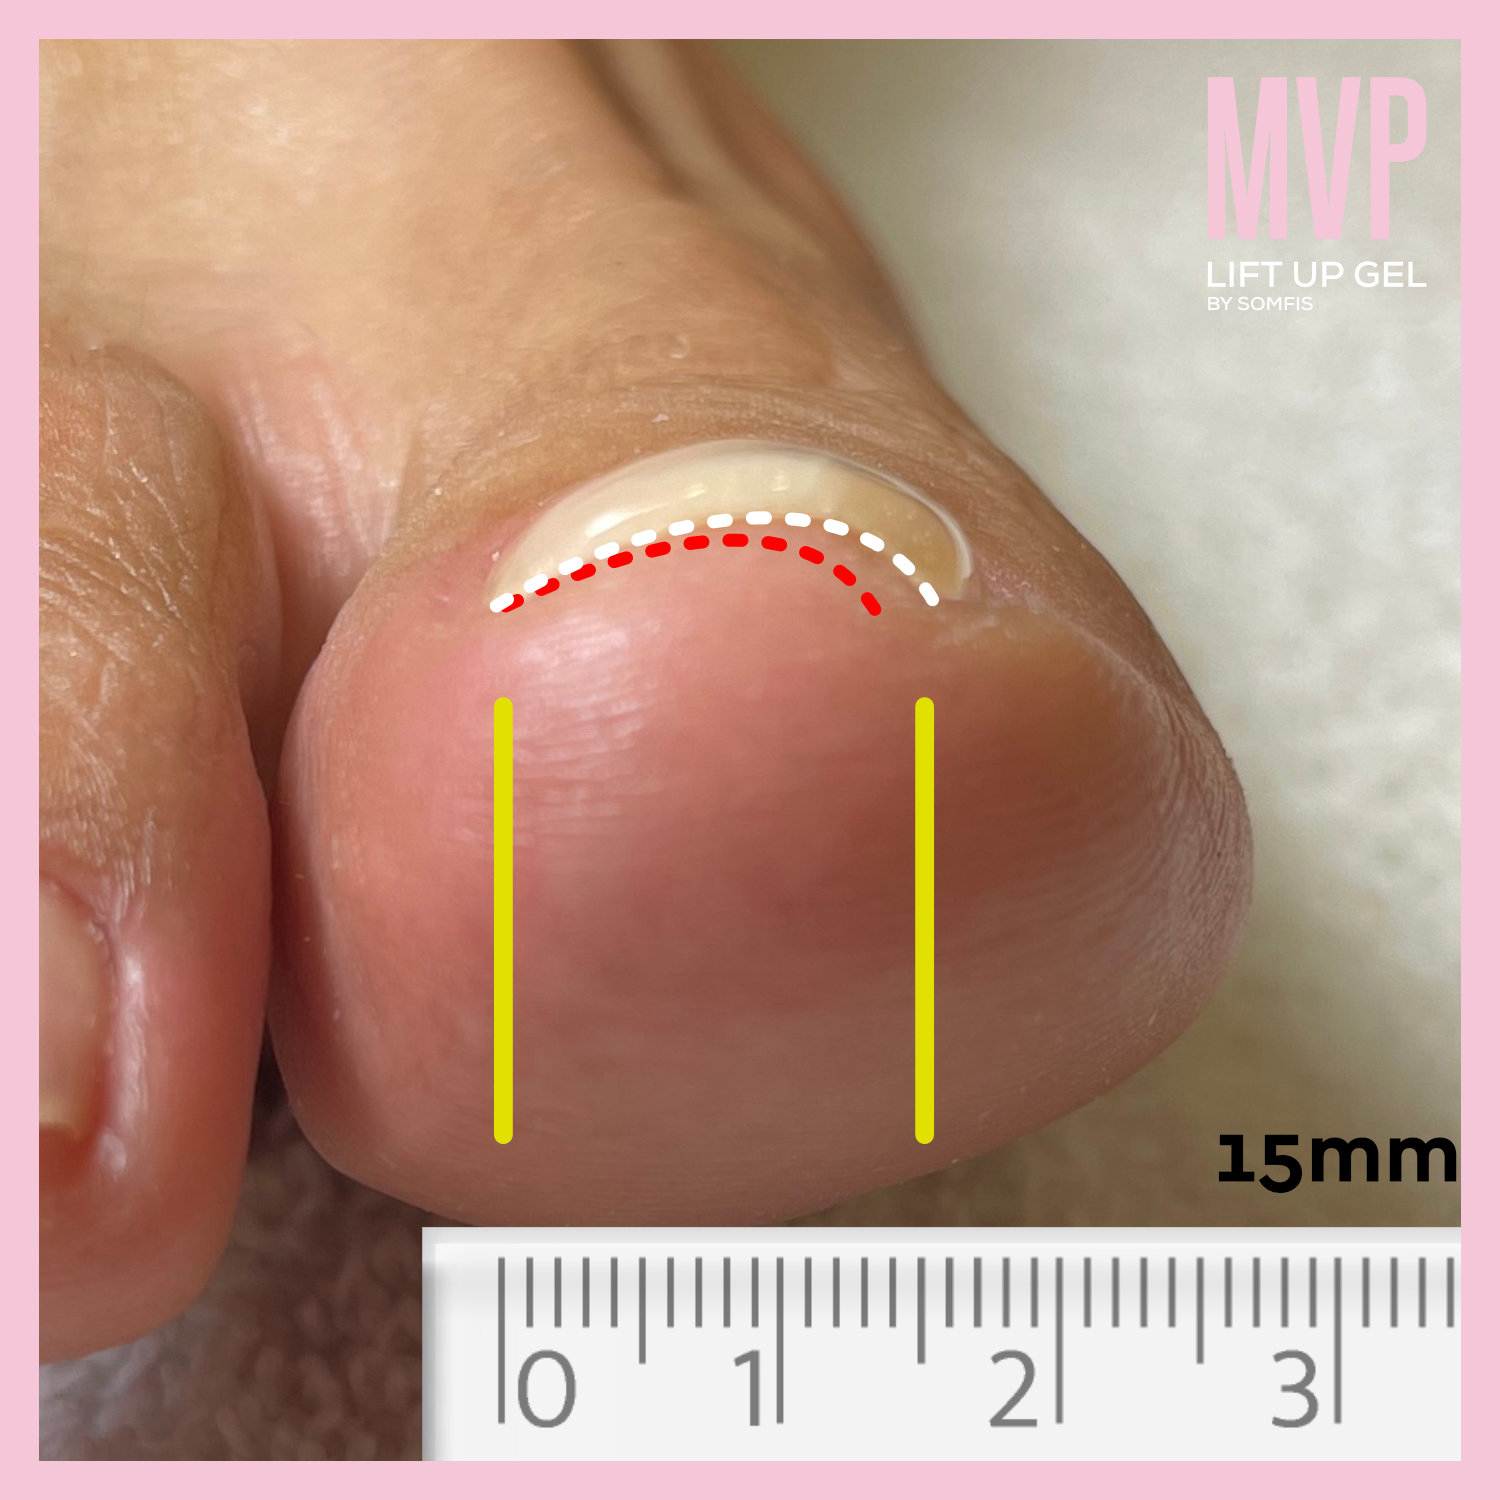
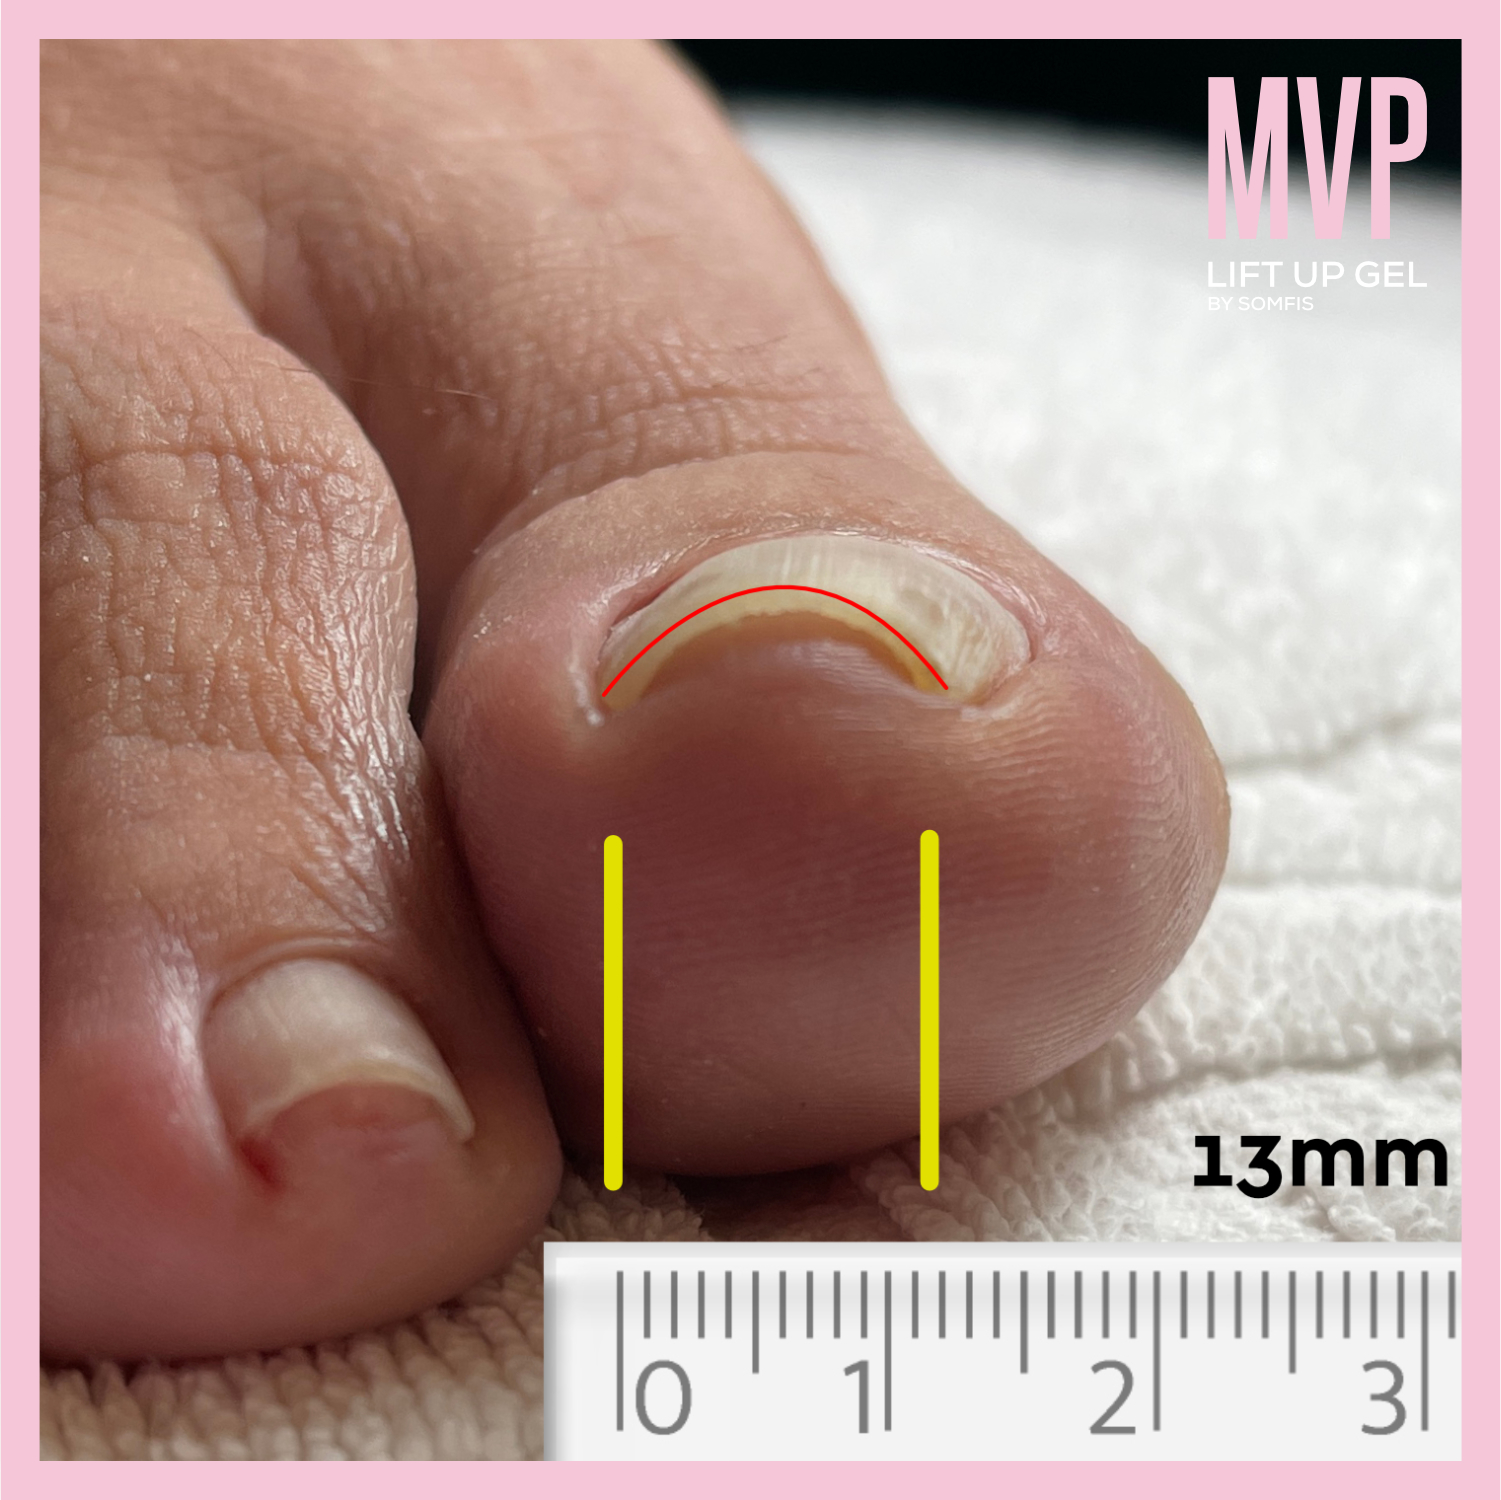
Pick the suitable Lift Up Care Gel according to each customer’s nail type:
MODERATE – CARE GEL UV/LED
Suitable for thin nails with a gentle curvature up to 40% C-curve. Apply 2–3 thin coats and cure in between layers.
CURE IN UV/LED FOR 30-60 SEC
VIVACE – CARE GEL UV/LED
Suitable for thicker nails with a pronounced curvature above 40% C-curve. Apply 2–3 thin coats and cure between layers.
CURE IN UV/LED FOR 30-60 SEC
PROTECT – CARE GEL UV/LED
This Protective Care Gel helps shield the nail surface, especially useful during winter months when closed or tight shoes are commonly worn. Apply 2–3 thin coats and cure between layers.
CURE IN UV/LED FOR 30-60 SEC
Step 3
LIFT UP TOP GEL UV/LED
This Top Coat formula has been developed to complement Step 1 & 2, while enhancing the durability of the Care Gel by sealing the previously applied layers.
Apply 2–3 thin coats and cure between layers.
CURE IN UV/LED FOR 30-60 SEC
Check our Frequently Asked Questions to learn more about nail care preparation
A pedicure is optional. If the customer prefers, you can work only on the chosen toenail. Alternatively, a wet pedicure can be combined with Lift Up Gel for a complete professional service.
Combining a Pedicure Service with MVP Lift Up Gel
STEP 1
Soak the feet
STEP 2
Clip the toenails to the desired length
STEP 3
Gently tidy up the cuticles and clean around the nail. If there is sensitivity, you can leave the detailed side cleaning for later in the process, once LIFT UP GEL has been applied.
STEP 4
Complete any additional services such as heel care, foot scrubs, etc.
STEP 5
Dry the feet and toenails with a towel.
STEP 6
Apply LIFT UP Gel on the selected toenail, following the steps shown here.
Once you have applied LIFT UP Gel, you can proceed with gently refining the sides of the toenail. At this stage, the nail’s shape is already enhanced, allowing for a more precise and aesthetic finish.
STEP 8
Gel Polish application (optional). This step depends on the customer’s preference and desired final look.
STEP 9
Seal with the LIFT UP Top Coat. For best results, it is recommended not to use a different UV/LED Top Coat.
NAIL POLISH:
If the customer prefers a classic nail polish instead of a gel color, this can be applied as the final step. After curing the LIFT UP TOP in UV/LED, simply apply the chosen polish and allow it to air-dry naturally.
Click below to watch a video of the above process.


